Exotic Fruits of My Labor — Passionfruit Shortbread

Passionfruit Shortbread.

In this continuation of my previous post, I have a recipe I found on the food blog, “Lucy’s Friendly Foods.” The writer is a mom with training at Le Cordon Bleu who cooks for people who have food allergies (the common ones, like dairy, soy, egg, and nuts) and those who are on vegetarian/vegan diets.

While I don’t have any food allergies (I thought I was allergic to seafood as a teenager because my eyes always itched and I had nausea, but the red eyes were from rubbing melted butter in them and the nausea could have been from foodborne illness) and you will never see me stick exclusively to a vegetarian/vegan diet (I love meat and junk food too much), age and my time as a culinary student with Job Corps made me more mindful of what I eat. On top of that, it’s an interesting cookie recipe no home cook (be they pro or amateur) should be without. It’s not going to take the place of Grandma’s chocolate chip cookies, but it’s something you have to try once (unless you hate passionfruit or shortbread cookies).

Happy eating!

Oreo Day (or The Sieve and the Sandwich Cookie)

Image

The old packaging I remember from the 1990s.

Another food celebration day has crept up on me. This time, it’s Oreo Day, though I would have gone with “Sandwich Cookie Day” for two reasons: a) Oreos aren’t the only sandwich cookies with a creamy center out there (especially since Nabisco is doing all it can to make Oreos different), and b) you know some overly politically-correct activist is going to get on his or her soapbox and declare that the name is racist. For those who don’t know, “Oreo” is a derogatory name for a black person who “acts white” (read: doesn’t listen to rap, has a good credit rating, isn’t on welfare, has a respectable job, etc). Other variations of this include the “banana” (an Asian who acts white), a coconut (a Hispanic or black person who doesn’t have African roots [like a Brazilian, a Jamaican, or someone from India] who acts white), and a “backwards Oreo” (a white person who acts black). While being called an “Oreo” may be a compliment (because, hey, you don’t follow the stereotypes of your race and cookies are always good), it does have the sting of “You should be ashamed of yourself for selling out to The White Man, the same White Man that enslaved your ancestors and took their sweet time giving us the same rights they have, and still keep us down today, albeit in more underhanded ways, never mind that we’re keeping ourselves down and, therefore, making ourselves look bad.” I guess whoever came up with these was only racist when he or she was hungry and, rather than get something to eat, decided to fan the flames of hatred a little more.

I can’t think of a time when Oreo cookies weren’t part of my life. It’s always been in my pantry, whether it’s the real deal or some discount store knock-off. Even as I’m typing this, there’s a discount store Oreo knock-off in my pantry, called Benton’s Chocolate Sandwich cookies waiting to be devoured by everyone in my family within the span of, oh, say, five days. And even when I couldn’t have the cookie, I’ve always had a dessert with Oreos in it (or flavored like a chocolate sandwich cookie), be it ice cream, cake, pie, or pudding. Oreo cookies are a lot like some of the cartoons I watched when I was younger: kids love them and are the main demographic, but the periphery demographic is mostly adults.

Image

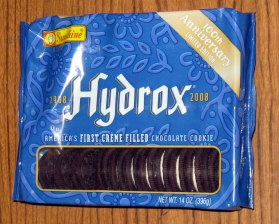
The competition: 1908-2001, with a brief comeback in 2008

Oreos were created in 1912 (making them a little over 100 years old, 102 to be exact) as a competitor to Hydrox Cookies, which, sadly, aren’t around anymore due to mergers, rebranding, and Oreo kicking Hydrox’s butt in sales. The last time Hydrox were seen was when they were sold as part of the product’s 100th birthday in 2008. Compared to Oreos, Hydrox’s filling wasn’t overly sweet, it was kosher/halal  (Oreo’s original recipe had lard in it, and, as Jewish and Muslim dietary laws will tell you, pork products are verboten, as pigs are seen as dirty, disease-ridden scavengers), and Hydrox’s chocolate wafer could stand its own when being dunked in milk.

When Oreo first started, it was known as the “Oreo Biscuit” (which is somewhat true, as a “biscuit” is what Americans and Canadians call a “cookie” and not a quick bread that’s used in a sausage sandwich for breakfast and served alongside chicken and mashed potatoes for dinner, and the product was originally made for British people in mind). It was developed and produced by the National Biscuit Company (Nabisco) in New York City (Chelsea area) on Ninth and 15th (which is known as “Oreo Way”). The original packaging was in novelty cans with clear glass tops and they sold for 25 cents a pound. Keep in mind that $.25 a pound in 1912 would be $5.86 today when adjusted for inflation, which is how much Oreos are priced in some of the mom-and-pop delis and kwik-e-marts I’ve been to. Okay, maybe not that much, but I’ve seen them go anywhere from $3.50 to $4.99 — minus tax, of course. As for the original packaging, Nabisco probably switched over to the “We Three Sleeves” packaging to keep the prices down and for freshness reasons, though I’ll bet you there’s a farmer’s market out there that has homemade, heart-smart, gluten-free, vegan Oreos in a decorative can (made of recycled materials, because that’s how the fair-food, go-green crowd works) that’s probably somewhere between $1.50 to $2.50 a pound (maybe more).

As mentioned before, the filling to the Oreo cookie had lard (pork fat) in it, making it unsuitable for eating if you were Jewish, Muslim, or just didn’t like pork and pork byproducts (and, unlike today, people didn’t really care if you were any religion other than Protestant or some kind of Baptist or Anglican Christian. Even Catholics were ragged on because they had a pope as their conduit to God and Protestants didn’t…or, if you want to put a modern perspective to it, maybe Protestants knew that Catholic priests did unsavory things to children, but it wasn’t a major concern until the 1990s, the 2000s, and now). Of course, to cover it up, they used vanilla and sugar. There was even a lemon-flavored cream filling in the 1920s, but has since been discontinued (though if you ever go to Japan or to some American markets, you will find lemon cream Oreo cookies, albeit with the Golden Oreo wafers instead of the chocolate ones. Lemon and chocolate don’t really make a good flavor profile, which is probably why it was discontinued).

Sam “Mr. Oreo” Porcello (exact day and month unknown, but the birth year is somewhere between 1935 and 1936 – died May 12, 2012) was a food scientist from New Jersey credited for devising the modern Oreo cookie filling, in which the lard is replaced with partially hydrogenated vegetable oil (still not healthy, but slightly better than lard). It wouldn’t be until 2005 that the Oreo would switch over to non-hydrogenated vegetable oil in an effort to rid food of trans fats (which, despite what you’ve heard or read, doesn’t affect the flavor, so those episodes of American Dad (“Live and Let Fry,” season four, episode 11) and King of the Hill (“Trans-Fascism,” season 12, episode 11) where Stan Smith and Hank Hill respectively fight back against the new “no foods with trans fats” laws because the no trans fats foods lack flavor is a fallacy.

The etymology behind “Oreo” is a mystery. Some say it’s partially from the French word “or,” which isn’t a conjunction used to denote a decision or choice in this case (in French, that word is “ou,” without the left-leaning accent. If it’s spelled with the left-leaning accent [où], then it’s the French word, “where,” as in “Where in the World is Carmen San Diego?”). In this case, “or” in French means “gold,” possibly meaning that this cookie is the gold standard. Another theory is that “Oreo” is from the Greek word “όμορφο,” meaning “beautiful, nice, or well-done” (Quick word: I don’t know Greek all that well, except for the alphabet, and that was back in sixth grade when I was taught about the Greek and Roman Empires and from watching TV shows and movies about college frat and sorority houses getting into trouble that would get real-life frats and sorority members hurt, expelled, arrested, shut down, put on academic probation, or, worst case scenario,  deported. I got the word off Google Translate). A final, and simpler, theory is that the name was made up by the company and it was chosen because it was easier to pronounce and remember.

Through the years, Oreo has become so much more than a chocolate sandwich cookie. Its filling has been everything from lemon to mint to chocolate to peanut butter — heck, if you go to China and Japan, you can get green tea filling in your Oreo, while other countries, like Chile, Argentina, Canada, Singapore, Indonesia, and Malaysia have blueberry ice cream filling, orange ice cream filling, strawberry filling, and dulce de leche (a milk-based confection that’s common as muck in the Hispanic world, particularly in Mexico, Puerto Rico, and the South American countries that have Spanish as an official language. Brazil, Guyana, French Guiana, and Suriname are the only ones that don’t) filling. There’s been Oreo pies, cheesecakes, regular cakes, brownies, ice cream, and frozen dessert dishes. The wafers, when ground up into crumbs, have been molded into pie crusts (or edible dirt, if it’s Halloween and you want to make a food-based scale model of a cemetery. Someone in my high school senior class did that, and it was amazing) and used as mixin’s for yogurt and ice cream. Basically, if something on the dessert menu says “Cookies and Cream [something],” you can bet that Oreos or an Oreo-inspired chocolate sandwich cookie (whether pre-made or homemade) are involved.

As part of Chocolate Sandwich Cookie Day, I’m going to leave you with a fool-proof recipe for how to make your own Oreo cookies (or, at the very least, the wafers, so you can use them for desserts or just eat that part without worrying about the creamy center). “You can make your own Oreos?” you ask incredulously. Yes, you can. It may seem hard, as the dark chocolate wafers are easy to overbake (their color obscures browned edging, which is an indicator of doneness in most cookie recipes) and the filling is very easy to foul up (coming out either too sweet or not sweet enough. I’ve had enough Oreos and no-brand sandwich cookies to know the difference), but this recipe fixes those mistakes.

The cookie/wafer part is prepared the same way as vanilla icebox cookies, only you substitute part of the flour for Dutch process cocoa (or a mix of black cocoa — which can only be found online or at gourmet grocery stores — and Dutch process cocoa), though you don’t have to bother with the cocoa powder if you’re making mock Golden Oreos. As for the filling, it’s a simple blend of confectioner’s sugar, water, vanilla extract (for best results, try and find clear vanilla extract, as that makes it as white as the actual Oreo filling), and a pinch of salt. That’s it. You don’t need lard or hydrogenated oil for it.

So break out the milk (doesn’t matter what kind. I had my Benton Sandwich cookies with Almond Vanilla Milk. I’m not lactose-intolerant, but everyone else in my family is and I’m open to trying new milks, like when I tried goat’s milk with spiced tea at Three Stone Hearth) and have a happy Chocolate Sandwich Cookie Day with this copycat recipe:

Chocolate Sandwich Cookies

Makes about 4 dozen cookies

Black cocoa (found in specialty shops or online) is what gives these cookies their distinctive dark color and deep flavor; if you can’t find it, substitute additional Dutch-processed cocoa powder. Also, if you can find it, clear vanilla extract will make a bright white–colored filling.

COOKIES

2½ sticks unsalted butter, softened

¼ cup black cocoa powder

¼ cup Dutch-processed cocoa powder

1 teaspoon instant espresso or instant coffee

1 cup (7 ounces) granulated sugar

¼ teaspoon salt

2 large egg yolks

1 tablespoon vanilla extract

2¼ cups (11¼ ounces) all-purpose flour

FILLING

4 cups (16 ounces) confectioners’ sugar

Pinch salt

1 tablespoon vanilla extract

2½ tablespoons water

FOR THE COOKIES:

Melt 4 tablespoons of the butter, then combine with the cocoa and espresso powders in a small bowl to form a smooth paste. Set aside to cool, about 15 minutes.

In a large bowl, beat the cooled cocoa mixture, remaining 16 tablespoons butter, granulated sugar, and salt together using an electric mixer on medium-high speed until well combined and fluffy, about 1 minute. Beat in the egg yolks and vanilla until combined, about 30 seconds. Reduce the mixer speed to low and slowly add the flour in 3 batches, beating well after each addition. Continue to beat until the dough forms a cohesive ball, about 10 seconds.

Transfer the dough to a clean counter and divide into 2 equal pieces. Roll each piece of dough into a 6-inch log, about 2 inches thick. Wrap the dough tightly in plastic wrap and refrigerate until firm, about 2 hours.

Adjust the oven racks to the upper-middle and lower-middle positions and heat the oven to 325 degrees. Line 2 large baking sheets with parchment paper.

Slice the dough into ⅛-inch-thick cookies. Lay the cookies on the prepared baking sheets, spaced about ¾ inch apart.

Bake the cookies until the edges begin to brown and firm, 10 to 12 minutes, switching and rotating the baking sheets halfway through baking.

Let the cookies cool on the baking sheets for 3 minutes, then transfer to a wire rack to cool completely. Repeat with the remaining dough using freshly lined baking sheets.

FOR THE FILLING: In a large bowl, beat the confectioners’ sugar and salt together with an electric mixer on low speed, slowly adding the vanilla and 2 tablespoons of the water until the filling is uniform and malleable, about 1 minute. If the filling is dry and crumbly, beat in the remaining ½ tablespoon water. Transfer the filling to a clean counter and roll into a log slightly smaller than the cookie dough (about 1⅔ inches wide). Wrap the filling in plastic wrap and refrigerate until firm, about 20 minutes. 7. Slice the filling about ⅛ inch thick. Pinch each slice of filling between your fingertips to soften it, then sandwich it firmly between 2 cookies and serve.

Thanks, and happy eating!

To see where your favorite Oreo cookie type places, read this article from the food section of Huffington Post: http://www.huffingtonpost.com/2014/03/06/oreo-flavors_n_4904442.html?utm_hp_ref=taste&ir=Taste

Copycat Recipes: Cuckoo For Cocoa Bombs

This is episode one in a new “Take Back the Kitchen” segment centered on making your favorite restaurant meals and pantry/refrigerator staples from scratch.

Welcome back, readers! It’s January 3, 2014, and, where I live, it’s an ass-biting 14ºF and is going to hit 5º by nightfall (and feel like 14 below). It’s times like this I wish I were back in San Francisco, where their winter weather is no different than what it’s like in early spring (mild and a little rainy).

But, this blog isn’t about the weather or where I’d rather be. It’s about food…and, in this case, drink.

In weather like this, hot drinks are the way to go, be it tea, coffee, cider, toddies, or cocoa. Nestlé, Swiss Miss, Ghiradelli Premium, Trader Joe’s, some Save-a-Lot no-brand — whatever your taste (and your budget), there’s nothing like a hot mug of hot cocoa (especially with marshmallows, but I’m not a marshmallow person, unless it’s roasted over a fire and sandwiched between a chocolate bar and some graham crackers or melted down and used to make Rice Krispie treats). But what if I told you that you can actually make hot cocoa mix and save yourself the time and money? Initially, you’d give me an incredulous look or dismiss me as being crazy, and, prior to that, I’d agree with you, but, yes, it is just as possible to make hot cocoa mix just as it is to make herbed crackers, egg foo young, or Fruit Roll-Ups (which I will touch on in later installments of “Copycat Recipes”). And this take on hot cocoa mix won’t leave a gritty, powdery aftertaste, which is one of the things I don’t like about hot cocoa.

The first thing you’ll notice about this is that it’s not a powdered mix, more like melting chocolate, then chilling it and turning it into pseudo-truffles or an edible fizzing bath bomb. That’s to reduce the mess you get with powders and to put you in control of how you want it flavored. What if you want some mint hot cocoa, or nutmeg, or cinnamon or Mexican-style (with dried, ground chiles)? Yes, you can flavor the powder with spices or add a flavored syrup, but it won’t mix well. Here, you get a better blend of chocolate plus whatever you’re flavoring it with (and, yes, you can use your favorite dessert liqueur, like Remy Martin, Kahlùa, Bailey’s Irish Cream or crème de mènthe if you want to make your hot cocoa adults only).

Instant Cocoa Bombs
(adapted from American Test Kitchen’s recipe)

Ingredients

12 oz (1 bag) semi-sweet chocolate chips*
1 cup heavy cream
1/4 tsp salt
Optional flavorings (mint extract, vanilla extract, crushed peppermint candy, smoked sea salt, cinnamon, nutmeg, pumpkin spice, dried ground chiles, your dessert liqueur of choice, ground coffee, etc)

1) Combine the chips, heavy cream, whatever flavoring you’re using (if any), and salt in a microwaveable glass bowl (I swear by Pyrex).
2) Microwave for 2 minutes (your microwave time may vary). If you don’t have a microwave, then melt the chocolate in either a double boiler or place the bowl with the mixture in it over a boiling pot of water (or the flame on your gas oven if you’re feeling ambitious). Either way, you’ll want to stir your melting mixture until it’s smooth. If you’re flavoring it, taste it to see if the flavored chocolate is where you want it to be.
3) Wrap the bowl tightly with plastic wrap (or use a shower cap and some rubber bands) and refrigerate for two hours or until firm.
4) After the mixture has hardened, take the bowl out of the refrigerator and unwrap.
5) With a tablespoon or a small disher scoop (Disher scoop is what laymen call “an ice cream scoop”. In restaurant supply stores, their sizes range from #6 to #100. A #6 or #8 [which is small and used for cookies] is ideal for this recipe), scoop the mixture into balls.
6) If you’re not going to use the cocoa bombs right away, wrap them in plastic and put them in a resealable freezer bag (or just put them in a freezer bag if you don’t have plastic wrap). They’ll keep anywhere from five days (refrigerator) or two months (freezer)
7) To use the cocoa bombs (either right away or later), place a cocoa bomb in a microwaveable mug (material doesn’t matter. It just has to be able to handle microwave temperatures), add milk (doesn’t matter if it’s cow, goat, soy, or lactose-free), and place in the microwave for 2 minutes (again, your microwave cooking time may vary). Stir until the cocoa bomb melts into the milk. Enjoy either with marshmallows, by itself, with whipped cream, or with a warm pastry, cookie, or brownie of some kind.

*You don’t have to use semi-sweet chcolate. Experiment with milk chocolate chips and white chocolate chips, or use Nutella (or any type of chocolate-hazelnut spread, whether store-bought or homemade)

As an added bonus, I’d like to include this video of how to make homemade marshmallows, along with the video illustrating how to make the cocoa bombs. The marshmallows take a bit more time to make, so you are better off getting store-bought, but, if you hate store-bought or have the time and energy to make homemade, then give this a try:

Instant Cocoa Bombs Video:

Homemade Marshmallows Video:

Happy New Year and happy eating!

Making Bacon: Not Just Sexual Innuendo Anymore!

Hello readers. Only three more days until I go back to my regularly scheduled blogging.

In the meantime, enjoy this video from America’s Test Kitchen (probably the only cooking show out there that isn’t inane or considered “food porn”). I don’t know if this show comes on where I live, but, this is the 21st century, and there’s practically no TV show out there that isn’t available online in some capacity (except for maybe these late 1990s horror comedy cartoons I liked: one was called “Toonsylvania,” which Steven Spielberg made when he first started DreamWorks Studios and the other was called “Monster Farm” about a boy named Jack who inherits a farm filled with monster animals. The latter show came on ABC Family Channel back when it was called FOX Family. The former show aired on FOX back when that channel and other free-TV channels, except for NBC and PBS, aired Saturday morning cartoons).

Enjoy, have a happy and healthy new year, and I’ll see you with new material.

Operation Thanksgiving 3: More Turkey Troubles (or Me Against The Kitchen)

Welcome to part three of “Operation: Thanksgiving,” your guide and my spin on that holiday that will pack your digestive tract tighter than the overhead luggage on an over-booked flight home. Last time around, I got into some cultural history about the holiday and how the goofy-looking turkey went from being domesticated by ancient peoples to carved by modern man (or woman) for an autumn holiday sandwiched between the garish, sugar rush of Halloween and the cold, yet heartwarming lull of Christmas (or Hanukkah, if you’re Jewish, Ramadan, if you’re Muslim, or no holiday if you’re Jehovah’s Witness, Buddhist, Hindu, atheist, or you’ve long given up on holiday cheer and want everyone else to know it).

Today, we’re going after the popular dishes of Thanksgiving, specifically, some subsitutes, new spins, and the right way to cook dishes you can’t do without…which means, “Yes, we will discuss how to make that turkey come out a little less dry so your critical relatives can get off your damn back,” which is the subject of today’s post.

Now, cooking for large crowds (what’s known in the foodservice biz as “high-volume service,” whether you’re serving the cream of the social crop at a fine-dining restaurant or serving the unfortunate souls who have to make due with soup from a homeless shelter. I’ve done both) isn’t for the weak or slow. You have to be on your game and make sure everything is prepared in time. You have to know how to do your stuff and do it well under pressure (again, a lesson learned from my Job Corps days). It also helps that you have others around you who can work as a team and also know what they’re doing. If you feel you can’t handle this, then don’t read and wait until the next entry. If, however, you are a seasoned Thanksgiving kitchen veteran or feel that you can handle it, then read on.

I’d like to thank the good people at Cook’s Illustrated, the writers of all those recipe books I poured through, and my Basic and Advanced Culinary Arts instructors who taught me well, as all my tips will be from these sources and it’s only fair to give them credit.

First up, the turkey:

This isn’t like the roast chicken you can make for Sunday dinner and use the leftovers for chicken salad sandwiches and feeding the outside cats (and the indoor ones) who won’t leave you alone, despite that you’re out of dry and wet cat food. A lot of care goes into making a turkey the best anyone’s ever tasted, regardless of whether you’re serving to a large family or just you (or you and someone you love).

If you know me at all, then you’ll know that one of my major pet peeves is a dry turkey. Everything else on the Thanksgiving menu can be five-star, but if the turkey is dry, then that’s a major flaw to me. Part of the reason is because I have that need for everything to be right. Then there’s the fact that I want to show others that the two years of learning culinary arts at Job Corps weren’t a waste, even if I never get a job in that field (I can show my support for farmers’ markets, sustainable agriculture, local growers, fair trade, and talented people who want to go to school to be five-star chefs, but don’t have the money or don’t know what to do to reach that goal, though), and the fact that I always get the hiccups whenever I eat dry turkey.

So, if this is your first time roasting turkey and you’ve been racking your brain on how to make that turkey moist, stop racking and start taking notes.

Let’s start off with why your turkey would end up dry. The most common reasons are either: (a) you overcooked the bird, or (b) you made a mistake in how it was prepared or while it was roasting in the oven.

You may have heard from cooking shows or dear old ma (or grandma) that a pat of butter under the skin or rinsing it is the key to juicy turkey. Well, you can tell dear old ma (or grandma) not to bother with her technique (no matter how many generations it’s been passed down), because you have some new tricks up your sleeve:

First, you need the right equipment:

a roasting pan three inches deep or less and a rack for even roasting.

This one has been with my family for years. We don’t have an inside-the-pan rack for it, but the turkey still comes out okay. The ones with the rack inside like this one…
…are good if you’re planning on turning the pan drippings into homemade gravy (which is simply your pan drippings, plus a flour/oil mix called a roux and some whipping cream if you want it smoother or have to stretch it).
Which leads me to my next secret to juicy turkey: your mirepoix (pronounced “mere-pwah,” named for a French field marshal and Louis XV’s ambassador, Charles-Pierre-Gaston François de Lévis, duc de Lévis-Mirepoix). “Mirepoix” is just a fancy name for the aromatic vegetables cooks chop up to flavor soups, stews, sauces, and roasted meats. It goes by various names, such as “sofrito” in Spanish, “refogado” in Portuguese, “Suppengrün” in German, “the holy trinity” in Creole and Cajun cooking, or “włoszczyzna” in Polish. A common mirepoix is made up of 2 parts onions for every one part of celery and one part of carrots (though you can also add or substitute for other aromatic vegetables, like leeks, parsnips, celeriac, bell peppers, garlic, or tomatoes). What you want to do is chop your aromatic veggies into medium to large chunks (depending on how big the turkey is) and spread the chunks out on the bottom of the pan, creating a flat surface.
But the mirepoix can’t make the turkey juicy alone. You need to season the bird all over — including the inside cavity. Salt and pepper are your go-to guys, but you can use any seasoning you want. Most of the time, I’m a kitchen-sink seasoner when it comes to roasting poultry  (meaning, “I use everything but the kitchen sink”), but you (and I) have a special blend when it comes to turkey. A nice dry rub I like to use for poultry is salt, pepper, a whisper of cinnamon, a pinch of nutmeg, some garlic (whether fresh and crushed or dry and powdered), some white pepper, and either basil or Italian seasoning.The spice rack (or spice section of your pantry) is your oyster; use it to your advantage. Do taste tests if you must to come up with a winning combination
It also helps if you stick an apple (Granny Smith, Fuji, and Gala are good. Save your Red Delicious for apple juice, apple sauce, or good, old-fashioned, out of hand eating) in the neck cavity. It keeps it juicy and imparts a fresh, fall flavor to it when combined with the cinnamon inside the bird. Or, you could do what I did four years ago and fill the cavity with dried cherries and fresh orange slices. It surprisingly came out good, but it imparted a very sweet taste to it that even I couldn’t handle.

Stuffing the bird also keeps it moist, but only if it’s a moist stuffing (read: it has broth/stock in it).
And last, but not least, some “dos” and “don’ts” for roasting your turkey:
  • Don’t truss the turkey. Trussing is when you tie the legs and wings of poultry together to keep its shape and cook evenly without drying out any of the extremities. You might be asking, “But Philly Foodie, how can you tell me not to do this if the goal is to have a turkey that’s not dry?” Well, in this case, trussing is a bad thing. The legs and wings are dark meat (which is from the active muscles of a bird) and dark meat doesn’t dry out quickly like white meat does. The dark meat will cook faster unfettered and thus reduce the chance of the breast overcooking by the time the dark meat is done. And if any of this sounds like sexual innuendo, I do NOT apologize, because it’s your mind that’s face-down in the gutter.
  • As much as TV, magazines, and your fellow home cooks make it seem glamorous and will pressure you into doing it, just say “No” to basting as your turkey roasts in the oven. The meat is covered by the skin and won’t absorb the juices, so why bother? Also, you will lose valuable heat by opening and closing the oven door a lot. Here’s how you combat this: For the first 20 minutes, roast the bird at a really high heat (450 degrees).  This will allow the skin to brown on the outside and lock in the juices. After 20 minutes, reset the oven temperature to 325 degrees, and turn the turkey upside down so the breast is on the bottom. Add ¼ cup of low sodium chicken stock seasoned with black pepper. This will act as a basting mechanism for the turkey. Since the breast cooks faster than the dark meat and needs less cooking, situating it breast side down exposes it to less direct heat.
  • The phrase “Stick a fork [or knife] in it. It’s done” actually does more harm than good for Tom Turkey, so don’t do it. Why? You lose valuable turkey juice that way.  Some folks like to use the pop up meat thermometers which are fine when they work while others use the leg check technique (read: if the leg when you wiggle it is very easy to move and the skin breaks the bird is done).  You can also use the “20 minutes per pound” rule for a no stuffing bird or the “25 minutes per pound” rule for a stuffed one, but if you’re not good with math, then stick with the other two methods.
  • Do remember is that once the turkey has reached the proper temperature (165 degrees Fahrenheit whether or not it’s stuffed), remove the turkey from the oven and allow it to sit 20 minutes to keep the meat moist. If you carve the meat immediately, all the juices will run out and your goal to make a moist turkey will have been a fool’s errand.

In the next post, we’ll go through the side dishes, sauces, and biscuits. See you then, and happy eating!

Friday Video: Cooking With The Fraternity Chef

This week on Take Back the Kitchen’s Friday Video (don’t worry; tomorrow I’ll have an article ready), Daniel “Dano” Pettinato shows you (and other starving college students) how to make macaroni and cheese. Personally, I don’t care much for it, but, to my sister, it means everything. I’m trying to wean her off the boxed and pre-made stuff in favor of “homemade”-style. I don’t think she can tell the difference. Food is food to her.

“Dano” Pettinato is originally from East Hartford, Conneticut. He is currently the chef for Psi Upsilon (Psi U) at Trinity College (also in Hartford, Connecticut). He has an online video series he created with ChefsInTheKitchen.tv (which is the same place I’m applying for to pitch a cooking show series — or do some kind of production work for them).